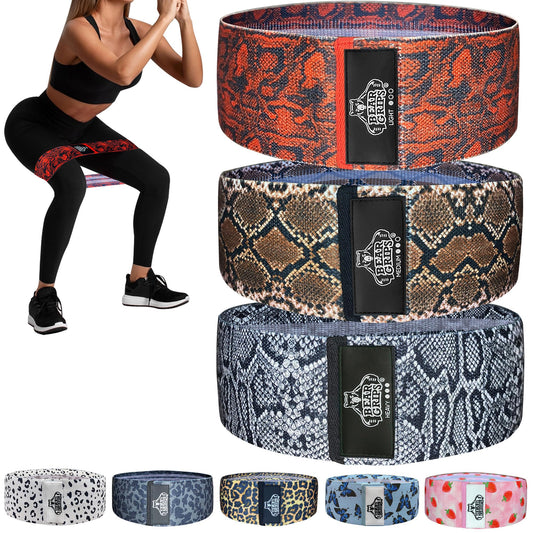
Having a strong and toned booty is not only a fitness trend but also a goal for many individuals seeking to improve their overall physique. A well-developed gluteus maximus not only enhances your appearance but also plays a crucial role in maintaining overall body strength and stability. It is essential for activities such as walking, running, climbing, and even maintaining proper posture. In this article, we will explore the significance of a strong booty and how it can benefit you both aesthetically and functionally. Booty bands, also known as resistance bands or mini bands, have gained immense popularity in the fitness world for their ability to intensify workouts and target the glutes effectively. These simple yet versatile tools can take your lower body training to the next level, helping you achieve your booty goals faster. We will delve into the numerous advantages of incorporating booty bands into your exercise regimen, from increased muscle activation to enhanced stability and flexibility. In this comprehensive guide, we will provide you with valuable insights into choosing the right booty bands to maximize your workout results. We'll cover various types of booty bands, factors to consider when selecting the perfect bands for your needs, and recommend some top brands and models to help you make an informed decision. Whether you're a fitness enthusiast looking to shape and strengthen your glutes or a beginner searching for the best equipment to get started, this article has got you covered. Choosing the Right Booty Bands A. Different Types of Booty Bands Fabric Booty Bands: Fabric bands are known for their durability and comfort. They are typically made from a soft, elastic material that doesn't roll up or pinch the skin during workouts. Rubber Booty Bands: Rubber bands offer excellent resistance and are often favored for their sturdiness. They can be found in various thicknesses to provide different levels of resistance. Loop Booty Bands: Loop bands form a closed circle and are designed for a wide range of lower body exercises. They are available in different resistance levels to suit various fitness levels. B. Factors to Consider When Selecting the Perfect Booty Bands Resistance Level: Choosing the right resistance level is crucial to match your fitness level and goals. Beginners may opt for lighter resistance, while advanced users may prefer heavier bands for more intense workouts. Material and Quality: Pay attention to the material and build quality to ensure durability and comfort. Look for bands that are made of high-quality, latex-free materials to prevent allergies. Size and Thickness: Different band sizes and thicknesses are available to target specific muscle groups and provide various levels of challenge. Consider your workout routine and goals when selecting the size and thickness that best suits you. Portability: If you plan to use your booty bands while traveling or outside the gym, consider their portability. Some bands come with a travel pouch, making them easy to carry. C. Recommended Brands and Models Peach Bands: Known for their durability and excellent resistance levels, Peach Bands offer a variety of band options to cater to different fitness levels. Their fabric bands are particularly popular for their comfort during workouts. Fit Simplify Resistance Loop Exercise Bands: These loop bands are highly versatile and come in a set with different resistance levels. They are perfect for beginners and advanced users alike. Fabric Booty Bands by Arena Strength: These fabric bands are made from a high-quality, non-slip material, making them perfect for a range of lower body exercises. They are known for their durability and comfort during workouts. Warm-up and Safety Precautions Before diving into your booty band workout, it's crucial to prioritize safety and ensure your muscles are properly prepared for the exercises. Here's what you need to know: The Importance of Warming Up Before Booty Band Workouts Warming up is an essential step in any exercise routine. It gradually increases your heart rate, raises your body temperature, and prepares your muscles and joints for the upcoming workout. For booty band exercises, a proper warm-up helps enhance muscle elasticity, preventing strains and injuries. Spend 5-10 minutes performing light aerobic exercises such as jogging in place, jumping jacks, or brisk walking to get your blood flowing. Safety Tips to Prevent Injuries During Exercises Proper Form: Maintaining correct form is crucial to prevent injuries. Focus on your posture and technique to ensure you're targeting the right muscles and avoiding unnecessary strain. Start with Light Resistance: If you're new to booty band exercises, begin with a lighter resistance band. As your strength and technique improve, gradually increase the resistance level. Avoid Overstretching: Don't stretch the bands beyond their limits. This can cause them to snap or break, potentially leading to injuries. Listen to Your Body: If you experience pain or discomfort during an exercise, stop immediately. Pain is your body's way of signaling that something isn't right. Balance and Stability: Perform exercises on a stable surface to avoid tripping or falling. Use a mat or non-slip surface when necessary. Stretching and Cooling Down for Recovery After completing your booty band workout, it's essential to cool down and stretch your muscles. Stretching helps improve flexibility, reduce muscle soreness, and promote recovery. Spend 5-10 minutes performing gentle static stretches for the glutes, hamstrings, and hips. This will aid in preventing post-workout muscle tightness and discomfort. Essential Booty Band Exercises Now that you're warmed up and aware of safety precautions, let's explore some essential booty band exercises that will help you sculpt and strengthen your glutes: Squats and Variations Standard squats Sumo squats Bulgarian split squats Glute Bridges and Hip Thrusts Single-leg glute bridges Weighted hip thrusts Lateral Leg Lifts and Leg Abduction Exercises Standing lateral leg lifts Seated leg abductions Clamshells and Fire Hydrants Clamshells Fire hydrants Donkey Kicks and Hamstring Curls Donkey kicks Hamstring curls Booty Band Workout Routines Now that you've mastered these essential exercises, let's explore different workout routines tailored to your fitness level: Beginner's Routine for Building Strength and Stability: A simple routine that focuses on foundational exercises to build strength and improve stability. Intermediate Routine for Increasing Muscle Definition: This routine adds more resistance and variations to enhance muscle definition and tone. Advanced Routine for Achieving a Sculpted and Toned Booty: Intense exercises and increased resistance to sculpt and tone your glutes for a more defined look. HIIT (High-Intensity Interval Training) with Booty Bands: Incorporating booty bands into high-intensity intervals to boost calorie burn and cardiovascular fitness while strengthening your booty. By following these guidelines, safety precautions, and workout routines, you'll be well on your way to achieving your desired booty goals with booty band exercises. Remember to progress at your own pace and consult a fitness professional if you have any concerns or limitations. Tips for Maximizing Results To ensure you get the most out of your booty band workouts and achieve your fitness goals, consider the following tips: A. Proper Form and Technique Maintaining correct form and technique is paramount for effective and safe workouts. Focus on precise movements to engage the targeted muscles and avoid injury. B. Adjusting Resistance Levels As your strength improves, don't hesitate to increase the resistance level of your bands. Progressive resistance challenges your muscles and leads to greater gains. C. Incorporating Progressive Overload Gradually increase the intensity, duration, or frequency of your workouts to continuously challenge your muscles. This principle of progressive overload helps you make consistent progress. D. Balancing Nutrition and Hydration A balanced diet and proper hydration are essential for muscle recovery and growth. Ensure you're fueling your body with the nutrients it needs to support your workouts. E. Tracking Progress and Setting Goals Keep a workout journal or use a fitness app to track your progress. Setting specific, achievable goals provides motivation and helps you stay on track. Troubleshooting Common Challenges Overcoming obstacles is part of any fitness journey. Here's how to address some common challenges: A. Dealing with Discomfort or Chafing Invest in quality workout attire and consider using anti-chafing products. Ensure your bands are adjusted comfortably to minimize discomfort during exercises. B. Addressing Plateauing in Your Progress If you hit a plateau, switch up your exercises, increase resistance, or vary your workout routine. Plateaus are normal, and adapting your routine can help break through them. C. Overcoming Motivation Slumps Staying motivated can be tough, but remember your fitness goals and why you started. Join a fitness community, seek workout buddies, or try new exercises to reignite your enthusiasm. Combining Booty Bands with Other Workouts Expand your fitness horizons by integrating booty bands into a broader exercise plan: A. Integrating Booty Bands into Your Full-Body Fitness Routine Use booty bands to target your lower body while combining them with upper body and core workouts for a complete body conditioning experience. B. Cross-Training for a Well-Rounded Physique Incorporate activities like cardio, yoga, or resistance training alongside booty band exercises to achieve a balanced and well-rounded physique. Conclusion In conclusion, booty band workouts are a versatile and effective way to sculpt and strengthen your glutes while improving overall lower body strength and stability. The exercises, routines, and tips provided in this comprehensive guide offer a blueprint for achieving your fitness goals and enhancing your self-confidence. Whether you're a beginner looking to kickstart your fitness journey or an experienced athlete seeking new challenges, booty bands can be a valuable addition to your fitness arsenal. Remember that consistency, proper technique, and progressive overload are key factors in realizing the full potential of booty band exercises. As you embark on your booty band journey, stay motivated, set achievable goals, and track your progress. With dedication and a well-rounded approach to fitness, you'll not only achieve a sculpted and toned booty but also enjoy improved overall health and well-being. So, grab your Bear Grips Booty bands, embrace the burn, and take the first step towards a stronger, more confident you. Your fitness journey begins now! Shop now at Amazon.com.
Iqra Saeed | 06 Feb 24
Incorporating pull-ups into your fitness routine is a time-tested way to develop upper body strength and overall muscularity. However, these challenging exercises can be intimidating, especially for beginners or those with limited upper body strength. Fortunately, there's a solution: banded pull-ups. In this guide, we'll explore how banded pull-ups can be a game-changer in your fitness journey by making this classic exercise accessible and effective. Benefits of Banded Pull-Ups Adaptability for All Fitness Levels Pull-up bands are a versatile tool suitable for beginners and experienced fitness enthusiasts alike. Regardless of your current strength level, you can adjust the band's resistance to match your capabilities, making pull-ups achievable for everyone. Building Upper Body Strength Banded pull-ups target major muscle groups in the upper body, including the back, arms, and shoulders. By providing adjustable resistance, these bands help you progressively increase your strength over time, leading to significant muscle development. Reduced Risk of Injury Banded pull-ups offer support during the exercise, reducing the risk of strain or injury, especially for beginners. The controlled assistance provided by the bands ensures a smoother and safer pull-up experience. Improved Form and Technique Pull-up bands encourage proper form by promoting controlled movements throughout the exercise. They assist in maintaining a steady pace and help you focus on technique, which is crucial for maximizing gains and minimizing injury risk. Enhanced Variability Pull-up bands enable you to explore different variations of the exercise, such as wide-grip, close-grip, or chin-ups, for a well-rounded upper body workout. You can easily switch between bands of varying resistance to adapt your routine and continue challenging your muscles. Choosing the Right Pull-Up Bands When it comes to performing banded pull-ups effectively, selecting the appropriate pull-up bands is crucial. There are various types of pull-up bands available, each offering different resistance levels and characteristics. Here's a detailed guide to help you make the right choice: Understanding Pull-Up Band Types and Resistance Levels Pull-up bands come in a variety of shapes, sizes, and materials. They are typically color-coded to indicate their resistance levels, with lighter bands offering less resistance and heavier bands providing more challenge. It's essential to understand the differences among them: Light Bands (e.g., Red or Yellow): These are ideal for beginners or individuals looking to focus on technique. They provide the least resistance and assistance during the pull-up, making it easier to perform the exercise correctly. Medium Bands (e.g., Green or Blue): Intermediate users often find medium bands suitable for adding more challenge while still providing assistance. These bands strike a balance between support and resistance, making them versatile for various fitness levels. Heavy Bands (e.g., Black or Purple): Advanced users or those seeking a greater challenge can opt for heavy bands. These bands offer substantial resistance and are excellent for building significant upper body strength. Tips on Selecting the Appropriate Band Consider Your Fitness Level: Assess your current fitness level and the number of pull-ups you can perform comfortably. If you're a beginner, start with a lighter band and gradually progress to heavier ones as your strength improves. Choose Multiple Bands: It's often a good idea to have a set of bands with different resistance levels. This allows you to tailor your workouts and gradually reduce assistance as you get stronger. Check Band Quality: Ensure that the bands you choose are made of high-quality latex or rubber to prevent snapping during use. Poor-quality bands can lead to accidents and injuries. Experiment and Adjust: Don't be afraid to experiment with different bands to find the one that suits you best. The goal is to find the band that provides the right amount of assistance without compromising your form. Step-by-Step Guide to Performing Banded Pull-Ups Now that you've selected the appropriate pull-up bands, it's time to dive into the proper technique for performing banded pull-ups. Correct form is essential for maximizing the benefits and safety of this exercise. Here's a detailed step-by-step guide: 1. Grip and Hand Placement: Begin by attaching the pull-up band securely to a pull-up bar or suitable anchor point above you. Stand under the band and reach up to grab the pull-up bar with a shoulder-width, overhand grip. Ensure your palms are facing away from you, and your hands are evenly spaced on the bar. 2. Foot Placement: Step into the hanging loop of the pull-up band with one foot while keeping the other foot on the ground. The banded foot should be centered on the band, and your other foot should stay firmly planted. 3. Initiate the Pull-Up: Hang from the bar with your arms fully extended, and your shoulders should be relaxed. Engage your core and pull your shoulder blades down and back. 4. Perform the Pull-Up: As you exhale, initiate the pull-up by bending your elbows and pulling your chest toward the bar. Keep your elbows close to your body throughout the movement. Focus on using your back muscles and avoid using excessive momentum or swinging. 5. Complete the Repetition: Continue pulling until your chin clears the bar or reaches a height that's comfortable for your fitness level. Pause briefly at the top of the movement, squeezing your back muscles. Inhale as you lower your body back to the starting position in a controlled manner. 6. Repeat and Progress: Aim for your desired number of repetitions while maintaining proper form. As you become stronger, gradually transition to lighter bands or perform banded pull-ups without assistance until you can perform unassisted pull-ups. 7. Breathing: Exhale during the exertion phase (the upward pull) and inhale during the lowering phase to maintain a steady breathing pattern. By following these detailed instructions on grip, body positioning, and breathing, you can execute banded pull-ups with precision, ensuring you get the most out of this effective upper body exercise. Tips, Variations, and Safety Measures As you embark on your journey to master banded pull-ups, it's essential to keep certain tips, variations, and safety measures in mind to optimize your workout and avoid potential pitfalls. Maximizing the Effectiveness of Banded Pull-Ups: Full Range of Motion: Ensure that you perform banded pull-ups through the full range of motion. Lower yourself completely until your arms are fully extended, and pull up until your chin clears the bar. This maximizes muscle engagement. Slow and Controlled: Emphasize a slow and controlled pace throughout the exercise. Avoid using momentum to swing your body, as this can reduce the effectiveness of the exercise and increase the risk of injury. Engage Your Core: Maintain core engagement throughout the movement to stabilize your body and protect your lower back. Common Mistakes and Safety Precautions: Overestimating Resistance: Be cautious not to select a band with too much resistance. Using an excessively heavy band can lead to poor form and strain. Start with a manageable level of resistance and progress gradually. Neglecting Form: Pay close attention to your form, especially when fatigue sets in. Avoid rounding your back or letting your shoulders hunch forward, as this can strain your shoulders and neck. Ignoring Proper Warm-Up: Always warm up your muscles before attempting banded pull-ups. Dynamic stretching and shoulder mobility exercises can help prevent injuries. Using an Unstable Bar: Ensure that the pull-up bar you use is sturdy and securely anchored. An unstable bar can lead to accidents and injuries during the exercise. Listen to Your Body: If you experience pain or discomfort while performing banded pull-ups, stop immediately. Consult a fitness professional or medical expert if necessary. Variations and Progression Strategies: Assisted Negatives: Start at the top position of the pull-up and slowly lower yourself down (the negative phase). Use the band for assistance as needed. This focuses on building strength during the lowering portion of the exercise. Mixed Grip Pull-Ups: Change your grip to a combination of overhand and underhand (chin-up) during your banded pull-ups. This targets different muscle groups and adds variety to your workout. Isometric Holds: Incorporate isometric holds at various points in the pull-up, such as holding at the top position or at 90 degrees. This builds strength at specific angles. Weighted Banded Pull-Ups: Once you've mastered banded pull-ups, consider adding additional weight using a weight belt or a weighted vest to further challenge yourself. Conclusion Incorporating banded pull-ups into your fitness routine can be a highly rewarding endeavor, offering numerous benefits for your upper body strength and overall physique. Remember to select the right bands, maintain proper form, and follow safety precautions diligently to make the most of your workouts. By incorporating variations and gradually progressing in your resistance levels, you can continuously improve your banded pull-up skills and work toward performing unassisted pull-ups, reaching your fitness goals and enjoying the satisfaction of achieving a challenging exercise milestone. Shop now at Amazon.com.
Iqra Saeed | 06 Feb 24
Pull-up bands, also known as resistance bands, are pivotal in the realm of physical fitness, offering a versatile, effective, and convenient method for strength training and muscle development. These bands are made from high-quality, stretchable materials that provide resistance when stretched, making them perfect for a wide range of exercises beyond just pull-ups. The Importance of Pull-up Bands in Fitness The significance of pull-up bands in fitness routines cannot be overstated. They serve as an essential tool for anyone looking to improve their strength, flexibility, and overall physical health. One of the key features of pull-up bands is their ability to provide a scalable resistance, which can be adjusted according to the user's strength level and the specific requirements of the exercise being performed. This adaptability makes pull-up bands suitable for everyone, from beginners to professional athletes. Types of Pull-up Bands Pull-up bands come in various types, each designed to cater to different needs and fitness levels: Light Resistance Bands: Ideal for beginners or for exercises that require a lighter touch, such as warm-ups and stretching. Medium Resistance Bands: Perfect for those with a moderate level of fitness, aiming to build muscle endurance and strength. Heavy Resistance Bands: Suited for experienced individuals looking to challenge their muscles further, ideal for building muscle mass and strength training. Variable Resistance Bands: These bands come with adjustable features, allowing users to change the resistance level as needed, providing a customizable workout experience. Understanding Resistance Levels The resistance level of a pull-up band is determined by its thickness and the material from which it is made. Thicker bands offer more resistance and are typically used for building muscle strength and mass, while thinner bands offer less resistance and are often used for stretching, flexibility exercises, and rehabilitation. Choosing the right resistance level is crucial for achieving your fitness goals while minimizing the risk of injury. Beginners should start with lighter resistance bands and gradually move to heavier ones as their strength and confidence grow. Benefits of Using Pull-up Bands Pull-up bands are not just a tool for enhancing your pull-up game; they're a versatile piece of equipment that brings a wealth of benefits to your overall fitness routine. Let's explore the key advantages of integrating pull-up bands into your workouts. Enhancing Strength and Muscle Tone One of the primary benefits of using pull-up bands is their ability to significantly enhance muscular strength and tone. The resistance provided by these bands forces your muscles to work harder, promoting muscle growth and strength. Unlike traditional weightlifting, where the resistance is constant, pull-up bands create a variable resistance. This means the tension increases with the band's extension, leading to more effective muscle engagement through the full range of motion. Improving Flexibility and Range of Motion Incorporating pull-up bands into your stretching routines can lead to noticeable improvements in flexibility and range of motion. The bands help in extending your reach and applying a gentle force, allowing for a deeper stretch. Regular use can aid in reducing muscle stiffness and enhancing movement efficiency, which is crucial for both daily activities and athletic performance. Supporting Injury Rehabilitation Pull-up bands are an excellent tool for rehabilitation exercises. Their adjustable resistance levels make them suitable for gradually reintroducing strength training following an injury. Physical therapists often recommend resistance bands to help restore muscle strength and joint mobility, ensuring a safer and more controlled recovery process. How to Choose the Right Pull-up Band? Selecting the appropriate pull-up band is essential to achieve your fitness goals while ensuring safety during workouts. Here are some factors to consider: Factors to Consider Based on Fitness Level and Goals Fitness Level: Beginners should opt for bands with lighter resistance to master the form and gradually build strength. More experienced users can benefit from medium to heavy bands to further challenge their muscles. Training Goals: If your aim is to improve muscle endurance, lighter bands used for longer repetitions are ideal. For muscle building, heavier bands that limit your reps to a lower range are more effective. Material Types: Most pull-up bands are made from latex or non-latex rubber, with some variations in thickness and width. Latex bands are stretchier and generally offer more resistance, whereas non-latex bands are a hypoallergenic alternative for those with sensitivities. Top Exercises and Applications Incorporating pull-up bands into your workouts can significantly enhance your strength training routine. Here's a detailed guide on how to use these versatile tools effectively, with specific exercises targeted at different muscle groups. Upper Body Strength Pull-up Assistance: Loop a band over a pull-up bar, place your foot or knee in the band, and perform pull-ups. The band's resistance helps lift your body, making pull-ups more accessible. Banded Push-ups: Place a pull-up band across your back and under your hands while in the push-up position to add resistance, increasing the difficulty and intensity. Core Strength Plank Pulls: In a plank position, loop a band around a fixed object and hold the end with one hand. Pull the band towards your waist, engaging your core throughout the movement. Banded Pallof Press: Stand perpendicular to a band attached to a fixed point. Hold the band with both hands and extend your arms forward, engaging your core to resist rotation. Lower Body Strength Squats: Stand on a band with feet shoulder-width apart, holding the other end with both hands at shoulder level. Perform squats while the band adds resistance. Glute Bridges: Place a band above your knees and lie on your back with feet flat on the ground. Lift your hips towards the ceiling, pressing your knees outward against the band's resistance. Advanced Techniques and Training Tips To continue progressing and avoid plateaus, consider the following strategies and safety tips: Progression Strategies Increase Resistance: Gradually move to bands with higher resistance levels as your strength improves. Combine Bands: For exercises that become too easy, add another band of the same or different resistance to increase the challenge. Safety Tips and Maintenance Inspect Bands Regularly: Before each use, check for any signs of wear or damage to prevent accidents. Proper Storage: Keep your bands away from direct sunlight and in a dry, cool place to prolong their lifespan. Conclusion Pull-up bands are a simple yet powerful tool in the arsenal of fitness equipment, suitable for individuals at all levels of their fitness journey. Whether you're looking to enhance your strength, improve flexibility, or rehabilitate an injury, these bands offer a versatile and effective solution. By incorporating the exercises and techniques outlined above, you can maximize the benefits of your pull-up bands, ensuring a balanced and comprehensive workout. Remember, progression and safety are key to any successful fitness regimen. With the right approach, pull-up bands can help you achieve your fitness goals, pushing you towards higher levels of physical performance. Shop now at Amazon.com.
Iqra Saeed | 06 Feb 24
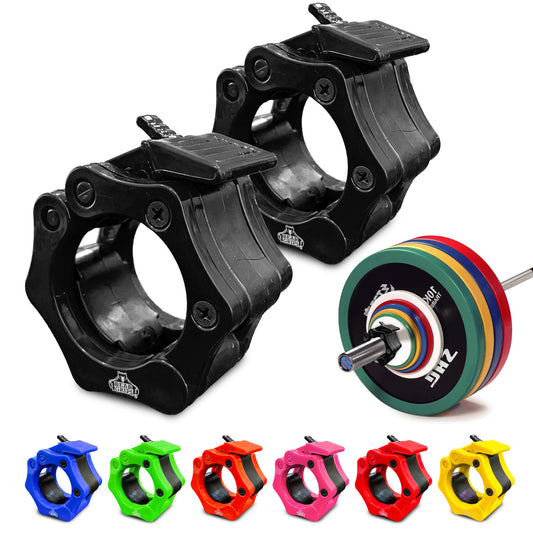
In the world of weightlifting, precision, safety, and equipment maintenance play pivotal roles in ensuring a productive and injury-free workout session. Among the myriad of gym equipment, barbell collars might seem inconsequential at first glance. However, their role is anything but minor. These small, yet mighty devices are crucial for securing weight plates on the barbell, preventing them from sliding off during a lift. Not only does this protect the lifter from potential injuries, but it also ensures the integrity of the workout by keeping the weights in place. Barbell collars come in various shapes and sizes, each designed to fit different types of barbells and serve distinct needs. From the traditional spring clip collars to the more modern lock-jaw and screw-type collars, the options are vast. Each type has its own specific mechanism for tightening, which can significantly impact your lifting experience. Understanding how to properly tighten barbell collars is essential for anyone looking to incorporate barbell exercises into their fitness regimen. Whether you're a beginner just starting out in the gym or a seasoned lifter aiming to refine your technique, mastering the art of securing your barbell collars can elevate your training, enhance safety, and ensure that every rep counts. In this article, we delve into the importance of tightening barbell collars, explore the different types available, and provide a comprehensive guide on how to secure them effectively. So, if you're ready to optimize your weightlifting practice and ensure your safety, read on. Importance of Barbell Collars in Weightlifting Barbell collars may not catch your eye immediately when you enter a gym, but their significance in weightlifting is unparalleled. These small devices, often overlooked, play a critical role in ensuring a safe and effective workout. Let's explore why barbell collars are indispensable in the realm of weight training. Safety First: The primary purpose of barbell collars is to secure weight plates on the barbell. This prevents the plates from sliding off during a lift, which could lead to serious injuries. Whether you're performing a heavy deadlift or a dynamic Olympic lift, the assurance that your weights are securely fastened can give you the confidence to focus on your form and execution without the fear of mishaps. Workout Integrity: Equally important is the impact of barbell collars on the integrity of your workout. When weights are firmly secured, it eliminates the distracting clanking of plates and ensures that the load is evenly distributed across the barbell. This stability is crucial for maintaining proper lifting technique, especially in exercises requiring precise balance and coordination. Different Types of Barbell Collars: There are several types of barbell collars available, each designed to suit specific needs and preferences. The traditional spring clip collar is widely used for its simplicity and effectiveness. However, lock-jaw collars have gained popularity for their ease of use and reliability, especially in high-intensity settings. Screw-type collars offer a more secure grip, making them ideal for heavy lifts and competitions. Understanding the importance of barbell collars and familiarizing yourself with the different types available is the first step towards enhancing your weightlifting practice. As we delve deeper into why tightening barbell collars is essential, it becomes clear that this seemingly small action can have a significant impact on your overall lifting experience. Why Tightening Barbell Collars is Essential Securing barbell collars might seem like a minor step in your workout routine, but its importance cannot be overstated. Tightening barbell collars properly is critical for several reasons, each contributing to a safer and more effective lifting experience. Preventing Accidents and Injuries: The most obvious reason to ensure your barbell collars are tightened is safety. Loose or improperly secured collars can lead to weight plates slipping off the barbell, creating a hazardous situation for the lifter and those around them. Such accidents can cause serious injuries, especially when performing lifts over your body, like squats or presses. Tightening your collars ensures that the weights stay in place, no matter the movement or intensity. Maintaining Proper Technique: Besides safety, tightened collars help maintain proper lifting technique. When weights are secured, they don't shift or wobble, allowing for more controlled movements. This stability is crucial, especially in exercises requiring high precision, like Olympic lifting. By eliminating the variable of shifting weights, you can focus on form, leading to more effective training and reduced risk of strain or injury. Enhancing Workout Efficiency: Tight collars keep the weight distribution even, preventing the barbell from becoming unbalanced. An unbalanced barbell can not only make the lift more difficult but also affect the targeted muscles, leading to uneven strength development or muscle imbalances. By ensuring that the weights are firmly in place, you're also ensuring that each rep is as efficient as possible. Peace of Mind: Knowing that your equipment is secure allows you to focus solely on your workout. The mental assurance that comes with tightened collars lets you push your limits without the distraction or fear of equipment failure. This peace of mind is invaluable for achieving peak performance and progressing in your lifting goals. Tightening barbell collars is a simple yet vital step in your workout routine. It ensures safety, maintains proper technique, enhances workout efficiency, and provides peace of mind, all of which are essential for a productive and injury-free weightlifting experience. Types of Barbell Collars and Their Tightening Mechanisms Barbell collars are not one-size-fits-all. Different types are designed to cater to various preferences, barbells, and lifting environments. Understanding how to properly tighten each type is key to maximizing your safety and workout effectiveness. Here are the most common types of barbell collars and how to secure them: Spring Clip Collars: Spring clip collars are the traditional choice for many gyms. They're made of metal and utilize a simple spring mechanism to clamp around the bar. To tighten, you compress the collar to open it, slide it onto the barbell, and release to secure it in place. While effective, they can require a bit of hand strength to operate and may not offer the tightest hold compared to other options. Lock-Jaw Collars: Lock-jaw collars have become increasingly popular due to their ease of use and secure grip. These collars typically feature a plastic or metal body with a locking mechanism. To secure them, you simply open the lever, place the collar on the barbell, and close the lever to lock the collar in place. They provide a quick and reliable way to secure weights and are ideal for fast-paced workouts. Screw-Type Collars: Screw-type collars offer the highest level of security. They work by threading a screw or bolt to tighten the collar around the barbell. To use, you place the collar on the bar, then twist the screw or knob until it's tightly clamped onto the bar. This type is especially favored for heavy lifting and competitions, where a secure hold is paramount. Magnetic Collars: A newer addition to the market, magnetic collars use powerful magnets to hold weights in place. They're incredibly easy to use—simply place them against the barbell, and the magnets do the rest. While convenient, their hold strength can vary, so they may be better suited for lighter lifts or as an additional safety measure. Key Takeaways for Tightening Barbell Collars: Ensure the collar is compatible with your barbell's diameter. Check that the collar is positioned correctly and fully tightened. Regularly inspect your collars for wear and tear to maintain their effectiveness. By choosing the right type of barbell collar and mastering its tightening mechanism, you can ensure a safer and more focused workout. Each type has its advantages, so consider your lifting style and preferences when selecting your collars. Step-by-Step Guide on Tightening Barbell Collars Ensuring your barbell collars are tightened correctly is crucial for a safe and effective workout. Here's a detailed guide on how to secure each type of collar mentioned earlier: Spring Clip Collars: Prepare the Barbell: Position your weight plates on the barbell as desired. Open the Collar: Compress the ends of the spring clip collar together to open it. Place the Collar: Slide the collar onto the end of the barbell, just past the last weight plate. Secure the Collar: Release the compression to allow the collar to tighten around the bar. Ensure it's snug against the weight plates. Lock-Jaw Collars: Prepare the Barbell: Load your barbell with the desired weight plates. Open the Collar: Lift the lever on the lock-jaw collar to open it. Place the Collar: Position the collar on the barbell, close to the last weight plate. Secure the Collar: Push the lever down to lock the collar in place. Check that it's tightly secured. Screw-Type Collars: Prepare the Barbell: Arrange your weights on the barbell accordingly. Loosen the Screw: Turn the screw or knob counterclockwise to open the collar. Place the Collar: Put the collar on the barbell, adjacent to the final weight plate. Tighten the Collar: Twist the screw or knob clockwise until the collar is firmly attached to the bar. Ensure it's directly pressing against the weights. Magnetic Collars: Prepare the Barbell: Set up your barbell with the chosen weights. Align the Collar: Hold the magnetic collar close to the edge of the barbell, near the last plate. Attach the Collar: Allow the magnets to snap onto the barbell, securing the weights in place. Check for Security: Ensure the collar is fully attached and the weights are immobilized. Common Mistakes to Avoid: Not checking the collar's compatibility with your barbell diameter. Failing to ensure the collar is tightly secured, which could lead to slippage. Neglecting regular inspection of your collars for signs of wear or damage. By following these steps, you can confidently secure your barbell collars, ensuring your safety and maximizing your workout efficiency. Whether you're a beginner or an experienced lifter, mastering the art of tightening barbell collars is an essential skill in your weightlifting toolkit. Maintenance and Care for Barbell Collars Proper maintenance and care of your barbell collars not only extend their lifespan but also ensure they continue to provide the necessary safety and stability during your workouts. Here are essential tips for keeping your collars in top condition: Regular Inspection: Periodically inspect your barbell collars for signs of wear, damage, or corrosion, especially if you frequently use them or if they're exposed to sweat and moisture. Look for cracks, rust, or any deformities that might affect their functionality. Spring clip collars and lock-jaw collars, in particular, should be checked for spring integrity and locking mechanism effectiveness. Cleaning: After each use, wipe your collars down with a dry cloth to remove sweat and moisture. For a deeper clean, use a mild detergent and water solution, but ensure they are thoroughly dried afterward to prevent rusting. Avoid using harsh chemicals or abrasive materials that could damage the collars. Proper Storage: Store your barbell collars in a dry, cool place to prevent moisture buildup, which can lead to rust and degradation. Magnetic and screw-type collars, which contain components that might be more susceptible to damage, should be stored in a way that minimizes impact and pressure. Lubrication: For collars with moving parts, such as spring clip collars and screw-type collars, occasional lubrication can help maintain smooth operation. Use a silicone-based lubricant to keep the mechanisms working efficiently, but apply sparingly to avoid attracting dirt and debris. Replacement: No matter how well you maintain them, barbell collars will eventually wear out and need replacement. If you notice any persistent issues with tightening or securing the collars, or if they show significant signs of wear, it's time to replace them to ensure your safety during workouts. By adhering to these maintenance and care tips, you can significantly enhance the safety, performance, and lifespan of your barbell collars. Remember, the small investment of time and effort in maintaining your equipment can pay off in the long run by preventing accidents and ensuring a seamless workout experience.  Shop Barbell Clamp Collar from Bear Grips now!
Iqra Saeed | 06 Feb 24
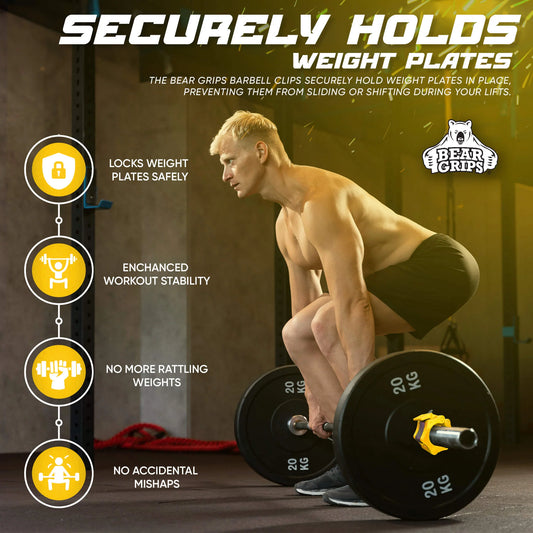
Barbell collars, often overlooked in the world of weightlifting accessories, play a critical role in the safety and efficiency of your workouts. These small yet essential devices are designed to keep the weight plates securely attached to the barbell, preventing unexpected plate movement and ensuring a stable lifting experience. The right barbell collar can make all the difference in your weightlifting journey. Selecting the wrong type or failing to consider key factors can lead to safety hazards, compromised performance, and even hinder your progress. In this article, we'll delve into the various types of barbell collars, their advantages and disadvantages, and provide guidance on choosing the best collar to suit your needs. This article aims to be your comprehensive guide to barbell collars. We will explore the different types of barbell collars available on the market, offering an in-depth analysis of their designs, benefits, and drawbacks. Additionally, we will discuss the critical factors to consider when selecting a barbell collar, ensuring you make an informed decision. By the end, you'll have a clear understanding of which barbell collar is the best fit for your weightlifting goals and preferences. Types of Barbell Collars Clamp-Style Collars Clamp-style collars are a popular choice among weightlifters due to their sturdy and reliable design. These collars typically consist of two metal or plastic plates with a clamping mechanism, such as a lever or screw, that tightens around the barbell's sleeves. The clamping action compresses the plates against the weight plates, securely locking them in place. Advantages: Excellent grip and a secure hold on the barbell. Quick and straightforward application and removal. Minimal plate movement during lifts, reducing distractions and potential accidents. Disadvantages: Some models may require more effort to tighten securely. The fit may not be universal for all barbell types, requiring careful selection. Spring-Clip Collars Spring-clip collars, also known as snap collars, are characterized by their simplicity and ease of use. These collars feature a metal spring that wraps around the barbell's sleeve. When compressed, the spring applies pressure to the weight plates, holding them in place. Advantages: Quick and effortless application and removal, making them ideal for fast-paced workouts. Lightweight and highly portable, perfect for those on the go. Disadvantages: May not provide as secure a grip as other collar types, potentially allowing for plate movement. Springs can wear out over time, diminishing their effectiveness. Lockjaw Collars Lockjaw collars are recognized for their robust and dependable design. Typically made of durable plastic, these collars feature a locking latch mechanism. When closed, the latch clamps onto the barbell sleeves, creating a strong and secure hold. Advantages: Exceptional grip strength, effectively preventing plate slippage. Quick and hassle-free to secure and release. Suitable for various barbell sizes, providing versatility. Disadvantages: May be priced slightly higher compared to other collar types, but the investment in safety and performance is worth it. Factors to Consider When Choosing Barbell Collars A. Weightlifting Goals When selecting the right barbell collar, one of the first considerations should be your weightlifting goals. Different types of workouts may require specific collar features. For instance: Powerlifting: If you're into powerlifting, where heavy lifting and stability are key, you'll want collars that provide an extremely secure grip like clamp-style or lockjaw collars. Olympic Weightlifting: Olympic weightlifting demands quick and dynamic movements, making spring-clip collars a popular choice due to their ease of use and speed in changing weights. General Fitness: For general fitness and home workouts, ease of use and versatility may be more important, making spring-clip collars or clamp-style collars suitable options. B. Safety Concerns Safety should always be a top priority when choosing barbell collars. Ensure that the collars you select can hold the weights securely in place to prevent accidents, injuries, or equipment damage during your workouts. Collars with a reputation for a strong grip and minimal plate movement, such as lockjaw or clamp-style collars, are excellent choices for safety-conscious individuals. C. Barbell Type and Size The type and size of your barbell play a significant role in collar selection. Different barbells have varying sleeve diameters, which affect compatibility with collars. Measure your barbell's sleeve diameter to ensure a snug fit. Some collars are designed to accommodate a range of barbell sizes, making them more versatile. D. Ease of Use Consider how user-friendly the collars are, especially if you value convenience and efficiency in your workouts. Spring-clip collars are known for their quick application and removal, making them suitable for fast-paced routines. Clamp-style collars, while highly secure, may take a bit more time and effort to fasten properly. E. Durability and Material The longevity of your collars depends on their durability and materials. Durable plastic, metal, or composite materials are commonly used. Check for collars that can withstand frequent use, dropping, and general wear and tear without losing their grip or breaking. Well-constructed lockjaw and clamp-style collars often excel in terms of durability. F. Price Range Your budget is an essential factor when choosing barbell collars. Collar prices can vary widely based on their features and materials. While it's tempting to opt for budget-friendly options, investing a bit more in high-quality collars can provide peace of mind regarding safety and long-term performance. Assess your budget and balance it with your desired collar features. By carefully considering these factors, you'll be better equipped to choose the ideal barbell collar that aligns with your weightlifting goals, safety priorities, and overall workout preferences. Best Barbell Collars for Different Needs A. Best Barbell Collars for Powerlifting For powerlifters who demand the utmost stability and security during heavy lifts, the Bear Grips Barbell Clamp Collars with Quick Release are an exceptional choice. These clamp-style collars offer: Superior Grip: The Bear Grips collars provide an excellent grip on the barbell, ensuring minimal plate movement even with heavy weights. Quick Release: Their quick-release mechanism allows for efficient and hassle-free weight changes during powerlifting sessions. Durability: Constructed from high-quality materials, these collars are built to withstand the rigors of powerlifting training. Versatility: While ideal for powerlifting, they can also be used for other types of lifting, making them a versatile option for serious strength athletes. B. Best Barbell Collars for Olympic Weightlifting Olympic weightlifters require collars that facilitate swift weight changes and secure holds during dynamic movements. While Bear Grips Barbell Clamp Collars are a suitable choice, spring-clip collars may also be preferred due to their speed and ease of use. C. Best Barbell Collars for General Fitness Enthusiasts General fitness enthusiasts often seek a balance of convenience and reliability. In this category, Bear Grips Barbell Clamp Collars with Quick Release still stand out as they offer a secure grip and easy handling. However, spring-clip collars may also be suitable for those who prioritize quick changes in weight during circuit-style workouts. D. Best Budget-Friendly Barbell Collars If you're looking for budget-friendly options, spring-clip collars are usually the most cost-effective choice. While Bear Grips Collars offer excellent value for their quality, you may find more affordable options among spring-clip collar selections. E. Best Premium Barbell Collars For individuals who prioritize top-tier quality and performance and are willing to invest in premium collars, Bear Grips Barbell Clamp Collars with Quick Release remain a strong contender. Their combination of grip, durability, and convenience makes them a premium choice without an exorbitant price tag. Ultimately, the Bear Grips Barbell Clamp Collars with Quick Release are a versatile option that can meet the needs of various types of weightlifters. However, the choice between clamp-style, spring-clip, or lockjaw collars will also depend on personal preferences and specific workout routines. Always consider your unique requirements when making your final decision. How to Properly Use Barbell Collars? Before we delve into the step-by-step guide, it's crucial to understand why securing weights with barbell collars is essential: Safety: Collars prevent weight plates from sliding off during exercises, reducing the risk of accidents, injuries, and damage to equipment. Stability: Properly secured weights provide stability, allowing you to focus on your lifts without distractions. Consistency: Collars help maintain consistent weight distribution, ensuring balanced and effective workouts. Step-by-Step Guide on Applying Barbell Collars To ensure your weights are securely fastened, follow these steps: Position Your Weight Plates: Slide the weight plates onto the barbell sleeves, ensuring they are evenly distributed on both sides. Align the Collars: Place the barbell collars on the outer edges of the weight plates, ensuring they are snugly against the plates. Tighten the Collars: Depending on the type of collars you have, use the appropriate fastening mechanism to tighten them. For clamp-style collars, use the lever or screw to secure them tightly. For spring-clip collars, compress the springs until they hold the plates securely in place. Lockjaw collars typically have a latch or clamp mechanism for fastening. Check for Security: After securing the collars, give them a gentle tug to ensure they are firmly in place and there is no movement of the weight plates. If any plates shift, re-tighten the collars. Safety Precautions While using barbell collars, always keep these safety precautions in mind: Regularly Inspect Collars: Before each workout, check the collars for any signs of wear, damage, or loose components. Replace damaged collars immediately. Avoid Overloading: Ensure that the combined weight of the plates does not exceed the barbell's recommended capacity. Overloading can strain the collars and lead to accidents. Proper Form: Maintain proper lifting form and technique to minimize the risk of plates shifting, even with secured collars. Stay Alert: Pay attention to your surroundings and the condition of the equipment throughout your workout to respond quickly to any issues. Maintenance and Care Tips for Barbell Collars Cleaning and Storage Recommendations To prolong the lifespan of your barbell collars and maintain their performance: Regular Cleaning: Wipe down the collars with a clean, damp cloth after each use to remove sweat and debris. Storage: Store your collars in a dry, cool place to prevent moisture buildup and corrosion. Avoid leaving them exposed to harsh elements or direct sunlight. Checking for Wear and Tear Periodically inspect your collars for signs of wear and tear: Latching Mechanism: Ensure the latching mechanism functions smoothly and securely. Material Integrity: Look for cracks, breaks, or any weakening of the collar's material. Grip Strength: Confirm that the collar still provides a strong grip on the barbell sleeves without slipping. Replacing Damaged Collars If you notice any issues during your inspections, do not hesitate to replace damaged or deteriorating collars promptly. Safety should always come first in your weightlifting routine, and maintaining your equipment is crucial to achieving a safe and effective workout. Conclusion In conclusion, the right barbell collar can make a world of difference in your weightlifting journey. We've explored the various types of barbell collars, their advantages, and how to select the best fit for your needs. It's essential to emphasize the significance of choosing the right collar to ensure safety, stability, and consistency in your workouts. Whether you're a powerlifter, an Olympic weightlifter, or a general fitness enthusiast, the Bear Grips Barbell Clamp Collars with Quick Release offer a versatile and reliable solution. So, take the step towards enhancing your weightlifting experience, prioritize safety, and achieve peak performance. Don't hesitate; secure your weights with Bear Grips Collars today and elevate your lifting game. Your journey to strength starts with the right equipment. Ready to upgrade your weightlifting game with the Bear Grips Barbell Clamp Collars with Quick Release? Click here to explore and purchase the ideal barbell collars for your needs!  
Iqra Saeed | 06 Feb 24
Weightlifting, whether for fitness, competition, or personal enjoyment, is a journey filled with challenges and triumphs. An integral part of this journey is ensuring safety and efficiency, and this is where barbell collars come into play. Often overlooked by novices, barbell collars are crucial for a secure weightlifting experience. They are not just accessories but essential tools that stabilize the weights on the bar, preventing them from sliding off during lifts. This introductory guide is dedicated to unraveling the mystery of barbell collars, explaining their importance, and setting the stage for their proper use. At their core, barbell collars are simple devices. Their primary function is to fasten weight plates onto the barbell, ensuring they stay in place during various exercises. Whether you're a seasoned athlete or a beginner, understanding how to use these collars correctly is vital for your safety. Improperly secured weights can lead to imbalance, increasing the risk of injuries and accidents. Thus, barbell collars are not just about convenience; they are a critical component of safe weightlifting practices. As we delve into this article, we will explore the different types of barbell collars available in the market, each suited for specific needs and bar types. You'll learn how to choose the right collar for your workout routine and how to use them effectively. We'll also address common mistakes and provide safety tips to ensure you get the most out of your weightlifting sessions without compromising your safety. Lastly, we'll touch upon the maintenance and care of these collars to ensure they remain functional and reliable over time. So, grab your barbell, and let's dive into the world of barbell collars, starting with understanding the different types available to you. Types of Barbell Collars: Exploring Different Varieties and Their Uses When it comes to weightlifting, the type of barbell collar you choose can significantly impact your workout experience. Barbell collars, while small, play a pivotal role in ensuring the weights stay secured on the bar. There are several types of collars available, each designed with specific features and uses in mind. Let's explore some of the most common varieties: Spring Clip Collars: These are the most traditional and widely recognized type of barbell collars. Made from a strong metal, spring clip collars are known for their simplicity and effectiveness. They work by squeezing the handles to open the collar, sliding it onto the bar, and then releasing to secure the weights. While they are generally reliable, they may lose tension over time and are not always suitable for heavier lifts. Lock-Jaw Collars: A more modern and user-friendly option, lock-jaw collars are made from a durable plastic and feature a locking mechanism. To use them, you simply open the collar, place it on the bar, and then snap it closed. This type of collar provides a more secure grip on the bar, making them ideal for dynamic exercises and heavier weights. Magnetic Collars: These are a relatively new addition to the market. Magnetic collars use powerful magnets to hold the weights in place. They are incredibly easy to use and provide a very secure hold, but they tend to be more expensive than other types. Screw-Tight Collars: For those looking for a more permanent solution, screw-tight collars are an excellent choice. These collars screw onto the bar, providing an extremely tight and secure fit. However, they are less convenient to remove and replace compared to other types. Lever Collars: Lever collars offer a balance between security and convenience. They use a lever to lock the collar in place, providing a firm grip on the bar. These are great for both heavy lifts and quick weight changes. Understanding the different types of barbell collars and their respective advantages can help you make an informed decision based on your workout style and safety needs. In the following section, we will dive into a detailed guide on how to use these collars effectively. Step-by-Step Guide to Using Barbell Collars: A Detailed Walkthrough Using barbell collars correctly is crucial for both safety and the effectiveness of your workout. Regardless of the type of collar you choose, the fundamental steps for securing them on the barbell are similar. Here's a step-by-step guide to help you master this essential skill: Select the Right Collar: Before you start, ensure that the collar is compatible with your barbell's diameter. Most standard barbells are 1-inch or 2-inch in diameter, and using the wrong size collar can lead to ineffective securing of the weights. Position the Weights: Load the desired amount of weight onto the barbell. Ensure that the weights are evenly distributed on both sides to maintain balance. Open the Collar: Depending on the type of collar, you might need to squeeze, unlock, or unscrew it to open. Make sure it's wide enough to slide onto the barbell easily. Attach the Collar: Slide the collar onto the barbell, up against the weights. For spring clips, release the handles gently once it's in place. For lock-jaw collars, snap the locking mechanism closed. For screw-tight or lever collars, secure them as per their specific mechanism. Double-Check for Security: After attaching the collar, give it a gentle tug to ensure it's securely in place. The collar should not move or slide on the barbell, and the weights should be firmly fixed. Repeat on the Other Side: Follow the same steps to secure the collar on the other side of the barbell. After Use: Once you are done with your workout, remove the collars by reversing the attachment process. Be mindful to maintain balance on the barbell as you remove the weights. Remember, the key to effectively using barbell collars lies in ensuring they are securely fastened and the weights are balanced. This not only prevents the weights from sliding off during your exercise but also helps in maintaining the integrity of your barbell over time. Common Mistakes and Safety Tips: How to Avoid Accidents and Maximize Efficiency Using barbells and weights in your fitness routine can be highly effective for building strength and muscle, but it's essential to prioritize safety to prevent accidents and injuries. Here are some common mistakes and safety tips to help you avoid accidents and maximize efficiency when using barbells: 1. Poor Form: Mistake: Lifting with improper form can lead to injuries and reduce the effectiveness of your workout. Safety Tip: Focus on maintaining proper form for each exercise. Seek guidance from a qualified trainer or use mirrors to check your form. 2. Overloading the Bar: Mistake: Using too much weight can strain your muscles, joints, and spine. Safety Tip: Start with a weight that allows you to perform exercises with proper form and gradually increase it as you become stronger. 3. Neglecting Warm-up and Cool-down: Mistake: Skipping warm-up and cool-down can increase the risk of injuries. Safety Tip: Spend at least 5-10 minutes warming up with light cardio and dynamic stretches. After your workout, cool down with static stretches to improve flexibility. 4. No Spotter: Mistake: Attempting heavy lifts without a spotter can be dangerous if you can't complete the rep. Safety Tip: Always have a spotter, especially when lifting heavy weights or performing exercises like bench presses. 5. Not Using Collars: Mistake: Failing to secure weights with collars can lead to plates slipping off during exercise. Safety Tip: Always use barbell collars to prevent weights from sliding off and causing accidents. 6. Ignoring Safety Clips: Mistake: Neglecting safety clips on adjustable barbells can lead to uneven weight distribution and instability. Safety Tip: Double-check that safety clips are properly fastened to secure weights in place. 7. Using Worn-out Equipment: Mistake: Barbells, plates, and collars can deteriorate over time, increasing the risk of accidents. Safety Tip: Regularly inspect your equipment for wear and tear. Replace any damaged or worn-out items. 8. Excessive Ego Lifting: Mistake: Trying to impress others by lifting heavier weights than you can handle can lead to injuries. Safety Tip: Focus on your own fitness goals and progress at your own pace. Avoid lifting beyond your capabilities. Maintenance and Care for Barbell Collars: Ensuring Longevity and Performance Proper maintenance and care for your barbell collars can help ensure their longevity and performance. Here are some tips: 1. Cleanliness: Regularly wipe down your collars with a damp cloth to remove sweat, dirt, and chalk buildup. 2. Lubrication: Apply a small amount of silicone or barbell collar-specific lubricant to the moving parts to prevent rust and ensure smooth operation. 3. Storage: Store your collars in a dry and cool environment to prevent rust and damage. 4. Inspections: Periodically check for loose screws or any signs of wear and tear. Tighten screws if needed and replace damaged parts promptly. 5. Proper Use: Use collars only for their intended purpose – securing weights on the barbell. Avoid using them as handles or for any other unintended functions. 6. Impact Prevention: Avoid dropping or slamming the barbell with excessive force, as this can damage the collars and affect their performance. 7. Replacement: If your collars show signs of wear, rust, or reduced performance, consider replacing them to maintain safety and effectiveness during your workouts. By following these safety tips and properly maintaining your barbell collars, you can enhance your workout experience, reduce the risk of accidents, and ensure the longevity and performance of your equipment. Conclusion In conclusion, maintaining safety and efficiency in your weightlifting routine is crucial for achieving your fitness goals while minimizing the risk of injuries. We've discussed the importance of proper form, using collars to secure weights, and caring for your equipment. To ensure you have the right tools for a safe and efficient workout, we recommend the Barbell Clamp Collars Quick Release from Bear Grips. These collars are designed with quality and convenience in mind, allowing you to securely fasten weights to your barbell quickly and easily. Don't compromise on safety and performance – visit Bear Grips today to explore their range of barbell clamp collars. Elevate your fitness routine and invest in the equipment that helps you reach your fitness goals while keeping you safe throughout your workouts. Your journey to a stronger, healthier you starts with the right gear, and Bear Grips has you covered. Click the link and make your purchase now!
Iqra Saeed | 06 Feb 24
Weightlifting thumb tape is a crucial accessory for anyone serious about their weightlifting game. Not only does it protect your thumbs, but it also enhances your grip and provides unparalleled comfort during intense workouts. Whether you're a seasoned lifter or just starting out, investing in thumb tape is a smart move to ensure a safe and effective lifting experience. Gym gear has come a long way, and thumb tape is no exception. Designed specifically for weightlifting, thumb tape is easy to apply and comes in various materials, colors, and patterns. One popular brand that stands out in the market is Bear Grips Tape. Known for its superior quality, this tape offers a strong adhesive, ample length, exceptional comfort, and versatility that keeps up with your demanding workouts. Protecting your thumbs is essential to avoid injuries such as calluses and blisters. Weightlifting thumb tape not only safeguards your thumbs but also improves your grip, allowing you to push your limits and achieve new personal records. Say goodbye to slipping weights and hello to a confident and secure grip with the help of thumb tape. Ready to take your weightlifting game to the next level? Let's dive in and learn more about weightlifting thumb tape, its benefits, and how to apply it effectively. Key Takeaways: Weightlifting thumb tape is a must-have gym gear to protect your thumbs, improve grip, and provide comfort during weightlifting exercises. Bear Grips Tape is a popular brand known for its superior quality, strong adhesive, ample length, and versatility. Thumb tape helps prevent injuries such as calluses and blisters, allowing you to focus on maximizing your lifts. Applying weightlifting thumb tape is a simple process that involves clean and dry hands, positioning the tape, wrapping it around, tearing it at the appropriate length, and securing it firmly. Don't compromise on quality when it comes to protecting your thumbs during weightlifting – opt for trusted brands like Bear Grips Tape for optimal performance. What is Weightlifting Thumb Tape? Weightlifting thumb tape is a type of adhesive tape designed to protect the thumb and improve grip during weightlifting exercises, such as using a barbell or dumbbell. Made from materials like cotton, nylon, and elastic, this specialized tape offers support, cushioning, and helps prevent injuries like blisters. Thumb tape is available in a variety of widths, lengths, colors, and patterns, allowing weightlifters to choose options that suit their individual preferences and style. Its adhesive nature ensures that it securely stays in place, even during intense workouts, providing stability and comfort to the thumb while lifting heavy weights. Weightlifting thumb tape is a must-have gym gear for those who prioritize protecting their thumbs and maximizing their lifts. By providing an extra layer of protection and enhancing grip, this adhesive tape helps weightlifters maintain control over the barbell or dumbbell, reducing the risk of injuries and allowing for a more secure hold. Why Use Weightlifting Thumb Tape? Weightlifting thumb tape offers several benefits for weightlifters. Firstly, it enhances grip strength, allowing you to lift heavier weights and reduce the risk of dropping the weight. Secondly, it protects the thumb from injuries by providing extra support and cushioning. Finally, it helps prevent calluses and blisters, which are common issues for weightlifters. Thumb tape is an essential gym gear that can maximize your lifts and keep your thumbs safe. When you engage in weightlifting exercises, a secure grip on the weights is crucial for proper form and effective workouts. Weightlifting thumb tape ensures that your thumbs stay in place, allowing you to maintain a firm grip on the barbell or dumbbell. This improved grip strength not only helps you lift heavier weights but also reduces the risk of accidents caused by dropping the weight. "Weightlifting thumb tape is like a safety net for your thumbs. It provides the necessary support and cushioning to keep your thumbs protected during intense workouts." - Sarah Smith, Pro Weightlifter In addition to enhancing grip strength, weightlifting thumb tape acts as a barrier between your thumbs and the weights. It provides extra support and cushioning, reducing the strain on your thumbs and preventing injuries. Whether you're lifting heavy weights or performing repetitive exercises, thumb tape can help alleviate pressure and discomfort, enabling you to focus on your form and maximize your lifts. Calluses and blisters are common problems weightlifters face due to the friction and pressure exerted on the hands. Weightlifting thumb tape helps prevent the formation of calluses by reducing the direct contact between the barbell or dumbbell and your skin. It also acts as a protective layer, minimizing the risk of blisters caused by rough or abrasive surfaces. With thumb tape, you can say goodbye to painful hand injuries and maintain smooth, injury-free skin. Protecting your thumbs during weightlifting is essential for maintaining long-term strength and preventing setbacks due to injuries. Weightlifting thumb tape offers a simple yet effective solution to safeguard your thumbs and enhance your overall lifting performance. Whether you're a beginner or a seasoned weightlifter, incorporating thumb tape into your workout routine can make a significant difference in your lifting capabilities. How to Apply Weightlifting Thumb Tape? Applying weightlifting thumb tape is a simple process that involves a few steps. Follow these instructions to ensure a secure and comfortable application: Clean your hands: Before applying the thumb tape, make sure your hands are clean and dry. This will help the tape adhere better and prevent dirt or oils from interfering with its grip. Position the tape: Start by positioning the tape at the base of your thumb, just above the joint. Ensure that the tape is centered and aligned with the length of your thumb. Wrap the tape: Begin wrapping the tape around your thumb, applying slight tension as you go. Make sure to overlap the tape slightly with each wrap to create a secure and supportive barrier. Tear the tape: Once you have reached the desired coverage or length, tear the tape using your hands or scissors. Be careful not to tear too much or too little; aim for a length that comfortably covers your thumb without restricting movement. Secure the tape: Press the loose end of the tape firmly against your skin to ensure it stays in place. Smooth out any wrinkles or creases to maintain a comfortable and uniform fit. Repeat for the other thumb: If you're using thumb tape for both hands, repeat the same steps for the other thumb to ensure equal support and protection. Step Description 1 Clean your hands 2 Position the tape 3 Wrap the tape 4 Tear the tape 5 Secure the tape 6 Repeat for the other thumb Conclusion Thumb tape for weightlifting is an essential accessory that helps protect your thumbs, improve grip, and maximize your lifts. When it comes to superior quality and performance, Bear Grips Tape Tape stands out from other options in the market. One of the key advantages of Bear Grips Tape is its comfortable and versatile design. Made with a strong adhesive, it stays securely in place even during intense workouts, providing you with the confidence to push your limits. Bear Grips Tape is also sweat-resistant, ensuring that it remains effective and reliable even when you're working up a sweat. With a generous length of 36 meters (118 feet), you'll have plenty of tape to last you through numerous sessions at the gym. Don't settle for anything less when it comes to protecting your thumbs during weightlifting. Choose Bear Grips Tape Tape for its superior quality, comfortable feel, versatility, adhesive strength, and sweat-resistance.  Enhance your thumb tape weightlifting with standard thumb tapes now available at Bear Grips!  Shop at Amazon.com Now! FAQ What is weightlifting thumb tape? Weightlifting thumb tape is a type of adhesive tape specifically designed to protect your thumb during weightlifting exercises. It helps improve grip, prevent injuries, and reduce the risk of calluses and blisters. Why should I use weightlifting thumb tape? Weightlifting thumb tape offers several benefits for weightlifters. It enhances grip strength, protects the thumb from injuries, and helps prevent calluses and blisters. How do I apply weightlifting thumb tape? Applying weightlifting thumb tape is a simple process. First, ensure your hands are clean and dry. Then, position the tape at the base of your thumb and start wrapping it around, tearing it at the appropriate length. Finally, secure it by pressing it firmly against your skin. Repeat the same steps for the other thumb if necessary.
Iqra Saeed | 06 Feb 24
A dipping belt, also known as a dip belt or hip belt, is a valuable tool that can enhance your bodyweight exercises. It consists of a thick belt with a chain or strap attached, allowing you to add additional weight to exercises like pull-ups, chin-ups, and dips. By using a dipping belt, you can increase the resistance level and target multiple muscle groups, leading to improved muscle development and strength. There are various benefits to incorporating a dipping belt into your workout routine: 1. Versatility: Dipping belts are versatile gym equipment that can be used by beginners, advanced lifters, and individuals practicing calisthenics. They allow for a wide range of exercises, targeting different muscle groups. 2. Affordability and Portability: Dipping belts are an affordable option compared to other weightlifting equipment. They are also portable, making them convenient for home workouts or for taking to the gym. 3. Increased Triceps and Back Strength: Adding weight to your bodyweight exercises with a dip belt helps strengthen your triceps and back muscles, enabling you to progress and build more strength over time. 4. Improved Chest Development: By adding resistance to exercises like dips, a dipping belt can enhance chest development and help you achieve a more defined upper body. 5. Belt Squats: In addition to upper body exercises, a dipping belt can be used for belt squats, providing an alternative to traditional barbell squats. This exercise primarily targets the quadriceps and can be beneficial for individuals with upper body limitations. With its versatility, affordability, and ability to target different muscle groups, a dipping belt is a valuable addition to any strength training routine. Whether you are a beginner or an experienced lifter, incorporating a dipping belt can help you take your workouts to the next level. Key Takeaways: A dipping belt allows you to add weight to bodyweight exercises for enhanced muscle development and strength. Benefits include versatility, affordability, and portability. Dipping belts help increase triceps and back strength, improve chest development, and allow for belt squats as an alternative to barbell squats. They are suitable for beginners, advanced lifters, and individuals practicing calisthenics. Incorporating a dipping belt into your workout routine can lead to improved overall strength and muscle development. What is a Weighted Dip Belt? A weighted dip belt is a versatile piece of equipment designed to enhance bodyweight exercises by allowing you to add extra weight. Similar to a traditional weightlifting belt, a weighted dip belt features a chain or strap attached to the front, which can be used to secure weight plates, dumbbells, or kettlebells. This specially designed belt is worn around the waist and provides a secure and comfortable fit, even with added weights. Weighted dip belts are commonly used in bodyweight exercises such as pull-ups, chin-ups, and dips, effectively increasing both the resistance and intensity of these exercises. A weighted dip belt enhances your bodyweight exercises by adding resistance and challenging your muscles to work harder, leading to increased strength and muscle development. Whether you are a beginner or an advanced lifter, a weighted dip belt is a valuable tool to take your workouts to the next level. Benefits of a Dipping Belt A dipping belt offers a range of benefits for strength training. It is a highly versatile piece of gym equipment that allows you to target multiple muscle groups, making it a budget-friendly investment. Additionally, dip belts are affordable and portable, making them a convenient option for workouts at home or while traveling. Using a dip belt can help you develop bigger and stronger triceps, enhance back strength, improve chest development, and perform belt squats as an alternative to barbell squats. These benefits make a dipping belt a valuable addition to any strength training routine. Benefits of a Dipping Belt: Targets multiple muscle groups Affordable and portable Enhances triceps and back strength Improves chest development Provides alternative to barbell squats with belt squats With a dipping belt, you have the flexibility to perform a wide range of exercises that engage different muscle groups. This versatility allows you to create diverse workout routines that keep your body challenged and prevent plateauing. "Using a dipping belt has been a game-changer for my workouts. It has helped me target specific muscle groups more effectively, resulting in noticeable gains in strength and muscle development." - Mark Thompson, Fitness Enthusiast Not only is a dipping belt versatile, but it is also an affordable and portable piece of equipment. Unlike bulkier weightlifting machines, a dipping belt can easily fit into a gym bag or suitcase, allowing you to stay consistent with your workouts no matter where you are. When it comes to strength development, a dipping belt is especially effective for building triceps and back strength. By adding additional weight to exercises like dips and pull-ups, you increase the load on these muscle groups, stimulating greater muscle growth and definition. Furthermore, using a dip belt can help you achieve better chest development. By performing chest dips with added weight, you challenge your pectoral muscles in a way that bodyweight exercises alone cannot replicate. This can lead to more defined and sculpted chest muscles. One unique exercise that can be performed with a dipping belt is the belt squat. This exercise mimics the movement of a barbell squat but transfers the load to your hips and legs rather than your upper body. Belt squats are an effective alternative for individuals with shoulder or upper body mobility issues, allowing them to still engage their lower body effectively. Achieve Versatile Workouts with a Dipping Belt Benefits Description Versatile Gym Equipment Target multiple muscle groups with one device Affordable and Portable Cost-effective and easy to transport Triceps and Back Strength Enhance muscle development in these areas Chest Development Improve pectoral muscle definition Belt Squat Perform an alternative to barbell squats Whether you are a beginner or an experienced lifter, the versatility, affordability, and effectiveness of a dipping belt make it a must-have tool for reaching your strength training goals. Top Dip Belt Exercises Using a dipping belt opens up a variety of exercises that can be performed with added weight. These exercises not only enhance muscle development but also improve overall strength. Some of the top dip belt exercises include: Weighted Chin-Ups and Pull-Ups Targeting the back muscles, weighted chin-ups and pull-ups are highly effective exercises for increasing strength. By attaching weights to the dipping belt, you challenge your muscles even further, promoting muscle growth and improved upper body strength. Weighted Dips Weighted dips are excellent for triceps and chest development. These exercises provide a challenging workout by increasing the resistance on your muscles. The dipping belt allows you to add extra weight, pushing your muscles to work harder and promoting muscle growth and strength gains. Hip Belt Squats While most dip belt exercises focus on the upper body, hip belt squats specifically target the lower body. By attaching weights to the dipping belt, you can perform hip belt squats, which are quad-dominant exercises. This exercise takes the pressure off the upper body and puts the emphasis on developing strong and powerful leg muscles. Incorporating these dip belt exercises into your workout routine can help you build muscle, increase strength, and enhance overall fitness levels. Choosing a Dip Belt When selecting a dip belt for your weightlifting needs, it's important to consider various factors that can impact your comfort, safety, and overall training experience. Dip Belt Material The material of the dip belt plays a crucial role in its comfort and durability. You have options like neoprene, nylon, and high-quality leather to choose from. Neoprene belts offer flexibility and cushioning, making them ideal for individuals seeking added comfort during their workouts. Nylon belts, on the other hand, are known for their strength and durability, providing long-lasting support. For those looking for a durable and premium feel, high-quality leather belts offer both style and reliability. Consider your preferences and priorities when selecting the material that suits you best. Chain Versus Strap Design Another important consideration is the design of the chain or strap that connects the belt to the added weights. Both chain and strap designs are capable of supporting substantial weight, but each has its advantages. Chains are popular for their durability and ability to distribute weight evenly, providing stability during exercises. Straps, on the other hand, can provide a snug fit and allow for quick and easy adjustments. Consider your comfort and training style when choosing between a chain or strap design. Chain Length The length of the chain is directly linked to the weight capacity and distribution of the dip belt. A longer chain allows for a greater range of motion and flexibility, ensuring proper weight distribution throughout the exercise. However, if the chain is too long, it may affect your form and stability. Conversely, a shorter chain provides more stability and control but limits your range of motion. It's crucial to strike a balance by choosing a dip belt with a chain length that aligns with your training needs and goals. Maximum Weight Capacity When choosing a dip belt, it's essential to consider the maximum weight capacity it can support. The maximum weight capacity will vary among different belt models, so it's important to select one that can accommodate the weight you plan to add. Be mindful of your training goals and progression, ensuring the dip belt can handle the increasing weight as you progress. Choosing a dip belt with a suitable maximum weight capacity will provide the necessary support and safety during your workouts. By carefully considering the dip belt material, chain versus strap design, chain length, and maximum weight capacity, you can select a dip belt that is comfortable, durable, and capable of supporting your weightlifting goals. Remember to prioritize your preferences and training needs to make the most informed decision. Conclusion Using a dipping belt can provide numerous benefits for strength training enthusiasts. By incorporating weighted exercises into your routine, you can target various muscle groups and achieve enhanced muscle development and overall strength. Whether you are just starting out or have years of experience, a dipping belt can be a valuable tool in your fitness journey. With a dipping belt, you have the flexibility to perform weighted exercises such as pull-ups, chin-ups, and dips, which effectively challenge your muscles and promote growth. The added resistance provided by the belt allows you to progress and push your limits, resulting in increased strength and muscle mass. Strength training is not limited to traditional weightlifting. With a dipping belt, you can engage in bodyweight exercises while still reaping the benefits of added resistance. This makes it a versatile piece of equipment suitable for individuals practicing calisthenics or those who prefer a more functional approach to training. When selecting a dipping belt, consider important factors such as the material, chain or strap design, chain length, and maximum weight capacity. By choosing a belt that suits your needs, you can ensure comfort, durability, and the ability to handle the weights required for your training goals. Grab best deal dipping belts today from Bear Grips!  Shop at Amazon.com Now! FAQ What is a dip belt? A dip belt, also known as a hip belt, is a thick belt with a chain or strap attached to it that allows you to add weight to bodyweight exercises. What are the benefits of using a dip belt? Some of the benefits of using a dip belt include versatility in targeting multiple muscle groups, affordability and portability, increased triceps and back strength, improved chest development, and the ability to perform belt squats as an alternative to barbell squats. What exercises can be performed with a dip belt? With a dip belt, you can perform exercises such as weighted chin-ups, weighted pull-ups, weighted dips, and hip belt squats. What should I consider when choosing a dip belt? Factors to consider include the material of the belt, the design of the chain or strap, the length of the chain, and the maximum weight capacity. Who can use a dip belt? Dip belts are suitable for beginners, advanced lifters, and individuals practicing calisthenics. Source Links https://us.myprotein.com/thezone/training/benefits-dipping-belt/ https://www.gymreapers.com/blogs/news/you-need-a-dip-belt https://www.dmoose.com/blogs/workout-training/why-you-should-invest-in-a-dip-belt
Iqra Saeed | 06 Feb 24